User Manual
Fixy Web
|
|
| Home |
| Working window of the system |
| File Menu |
| Reports Menu |
| "Information" Menu |
| Regions Menu |
| Groups Menu |
| Events Menu |
| Diary |
| Maps Menu |
"Information" Menu
By selecting the "Information" Menu you will be provided with the option of initial information entry.
- Data
- Reload
"Data" Submenu - This option enables you to enter data on the vehicles, drivers, users, groups, GPS devices, driver ID cards and working hours. The information is only entered by administrator-employees, who have the necessary rights of access.
Entering and editing vehicles
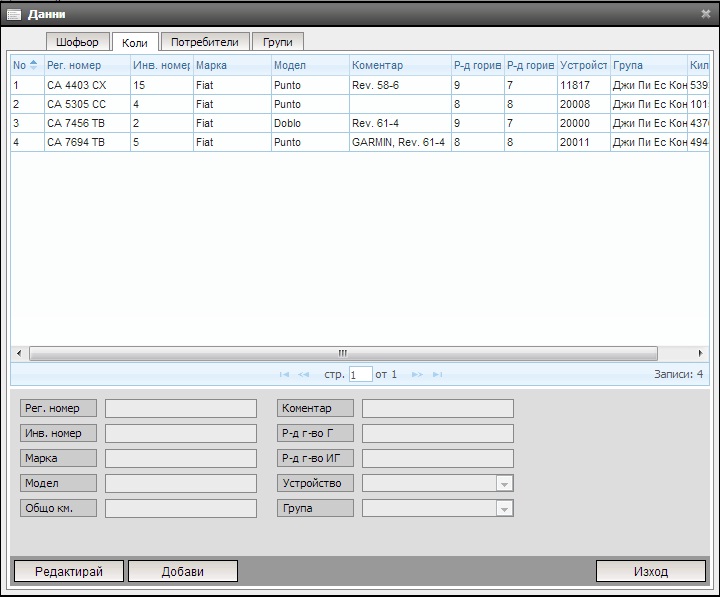
Entering vehicle data:
- Click on the "Add" button
-
Completion of the empty fields with all relevant data
If you have not completed all fields, the system will display an empty field message, e.g. :" Enter vehicle model".
The "Registration number" field is used to enter vehicle's registration number. The "Inventory Number" field is used to enter vehicle's inventory number, if any. If there is no inventory number, the serial number of the vehicle in the application is entered. The empty fields "Model" and "Make" are used to enter the vehicle model and make, respectively. The "Total Kilometres" field is used to enter the total number of kilometres, travelled before the installation of the device. If the vehicles are separated by activities, the "Comments" field may be used to indicate the department, to which the respective vehicle belongs. The two other fields are used to enter the average fuel consumption for in-city traffic "Fuel cons. C" and for non-city traffic "Fuel cons. NC" . In the "Device" field, after clicking on the arrow, a drop-down menu will be displayed, where you have to select the number of the device, installed in that vehicle (if the device list is empty, please contact you system administrator) . The "Group" field may be used to select the group, to which the vehicle belongs. In the cases, when the vehicles are not divided in separate groups, the "Group" field will only display the name of a single group.
- Click on the "Save" button
- Click on the "Reload" button
Editing or deleting vehicle data:
- Select the vehicle, you want to edit or delete from the window
- Click on the "Edit" button to change the data and change the column, which you want to change. To delete an entry, click on the "Delete" button
- Click on the "Save" button
- Entering/editing drivers' personal details
- Defining/editing users
Creating groups and adjusting the working hours of each group
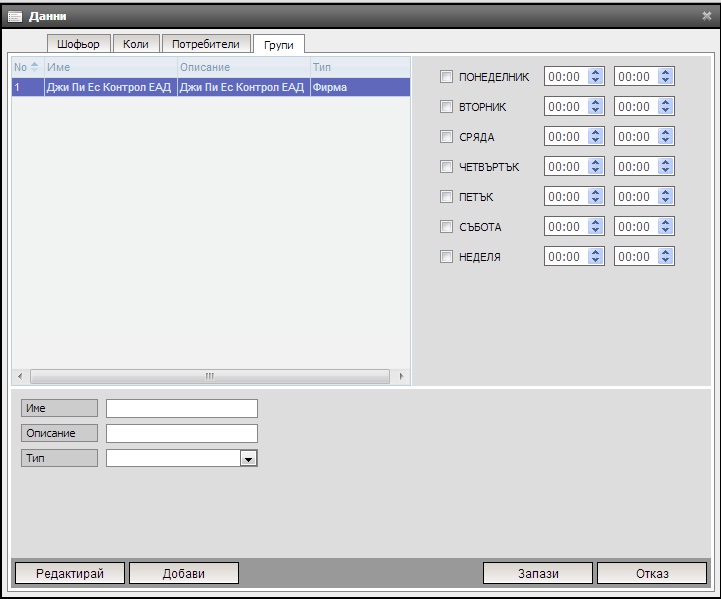
This window to the main group, which is actually your company, which is entered in advance, is used to enter sub-groups.
- Click on the "Add" button
- Complete the empty fields with the relevant data
If you have failed to fill-in all fields, the system will display a message with the missing field.
Use the "Name" field to enter the name of the new group, as the group names that you create, must not coincide. Use the "Description" field to record the activity, which will be performed by the new group. From the "Type" drop-down many select the division of your company. If you have to make changes in the data on already entered group, select first the name of the group, from the groups window and then click on the "Edit" button and finally click on the "Save" button.
If you want the reports to display the kilometres travelled during working and non-working hours, you will have to enter the working hours in the column with the days of the week, on the right-hand side of your screen. First, use the group names window to select the group, to which you want to assign working hours. Then click on the "Edit" button. On the right-hand side of the screen you can select the working hours of the group for each day of the week. First you must left-click the empty field next to the day, and then enter the starting time of the workday in the first field, and the end of the working hours in the second field, with respect to the vehicles in the selected group. The hours may also be entered, using the up and down arrows in the fields or the numbers on your keyboard, followed by clicking on "Save".