User Manual
Fixy Web
|
|
| Home |
| Working window of the system |
| File Menu |
| Reports Menu |
| "Information" Menu |
| Regions Menu |
| Groups Menu |
| Events Menu |
| Diary |
| Maps Menu |
Regions Menu
Selecting the "Regions" menu provides you with the option to enter regions in the application, which can be differentiared by type - polygon, line and point . The regions are drawn on maps and allow the user to monitor the movement of the object within/outside of the specified regions . The user may define for a region, the name, color, contour and filler /if the region is a polygon/ to facilitate his work.
In order to create a region, for the movement of the vehicle
- You must specify a group name
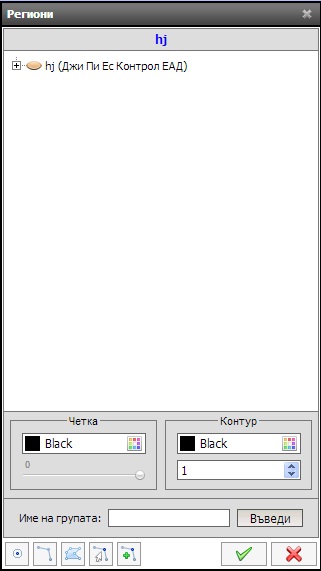
In te empty field, next to "Group name" enter the name of your choice, and then click on the "Enter" button. The name of the regions group will be displayed in the top left corner of the "Regions field".
- Start with frawing the region, object (point) or line .
Left-click on the newly created region and then use the toolbar, at the bottom of the "Regions" window.

- the first button on the toolbar is designed for drawing a point (object) on the map;
- the second button on the toolbar is designed for drawing right lines;
- the third buttton on the toolbar is designe for drawing regions ;
- the fourth button is designed for changing already created regions, lines or points;
- the last button on the drawing toolbar is desinged for adding points to existing regions (polygons);
Creating points (objects)
In order to draw a point or object, click on the point button, which will open a dialogue window with : "Enter figure name". After entering the name of the figure, choose a place on the map and left-click on it, which will produce a point or an object on the map. The many times you position the muse pointer on the map, the many points (objects) will the application create.
If you want the point (object) to have a wider raius, you may use the up/down arrows in the "Contour" panel.

After you have created the necessary points (objects) you must press the information recording button for the last two buttons.
Creating a line
In order to draw a line on the card, left-click on the line, which will open a dialogue, with : "Enter figure name".After entering the figure name, choose the location of the starting point of your line on the map and left-click on it, and you will see the start and end of the line. The many times you left-click on the map, the many lines you will draw. After completing the drawing of the line, you must press the information recording button for the last two buttons.
Creating a region
To draw a region, left-click on the region, which will open a dialogue with: "Enter figure name".After entering the figure name, choose the location of the starting point of your region on the map and left-click on it, left-click on the map as many times, as necessary until you obtain the desired regionAfter completing the drawing of the region, you must press the information recording button for the last two buttons.
ATTENTION : As long as the application is desifned for real-time monitoring, the created regions, as well as the points and lines, cannot be deleted.
You can change the perimeter of the created region by clicking on the "Select" button (the fourth button in the toolbar ), and then left-clicking and dragging the points in the desired direction. After making the changes, click on the save button.
The last button in the toolbar is designed for adding points to existing regions (polygons) - click on the button, which will prodice a point (object) at the selected location in the existing region. After entering the necessary number of points (objects) in the region, click the save button .
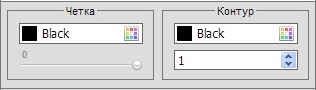
For easier distinguishing you can color the regions, points and lines in different colors, using the "Painbrush" and "Contour" panels.